Bats are fascinating creatures that have captured the imagination of children and beginner artists alike. Drawing a cartoon bat may seem like a daunting task, but with the right guidance, it can be a fun and easy process. In this article, we will provide you with a step-by-step guide on how to draw a bat. Whether you prefer traditional or digital art, this guide is suitable for both mediums. So, let’s grab our pencils or tablets and get started!
Step-by-Step Instructions on How to Draw a Cartoon Bat
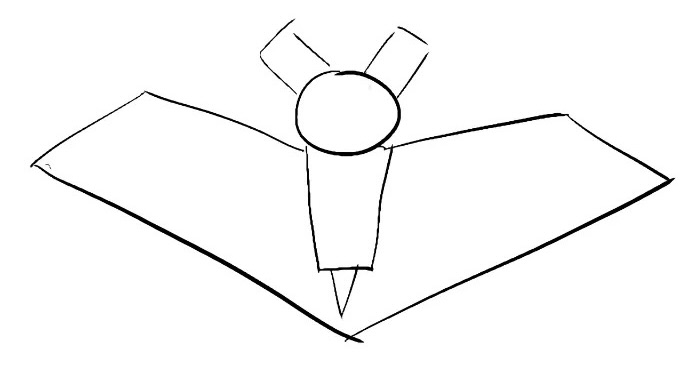
Step 1: Draw the Basic Shapes of the Bat
The first step in drawing a bat is to start with the basic shapes. This will serve as a foundation for your drawing and make it easier to add details later on. For this step, you will need paper, a soft pencil , and a hard pencil (2B-4B) if you are drawing traditionally. If you are using digital tools, simply open your favorite drawing app. For this guide, we will be using Procreate.
To begin, draw a circle for the head of the bat. This circle does not need to be perfect and is only used as a reference. Next, add two triangles on either side of the circle for the ears. These triangles should be slightly curved at the top to give the impression of pointed ears.
Now, draw an ellipse for the body of the bat and two rectangles beside it for the wings. The size and shape of these rectangles will depend on how big you want your bat to be. Don’t worry about making them perfect at this stage, as you will be refining them in the next step.
Step 2: Draw the Head and the Ears
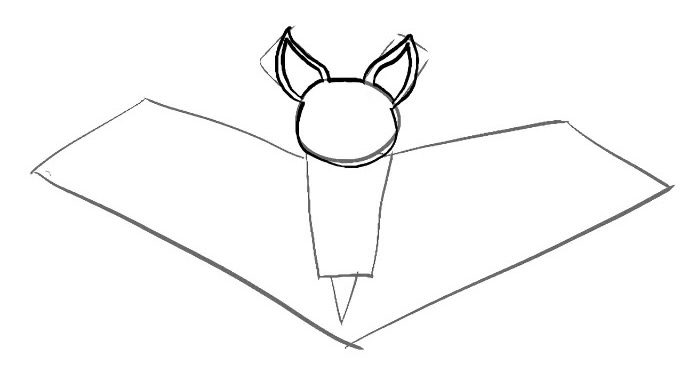
In this step, we will focus on adding details to the head and ears of the bat. Using your reference circle, draw the face of the bat. Make the bottom part of the face slightly longer than the top to give it a more realistic shape. Next, add two small circles for the eyes and a small triangle for the nose in the center of the face.
Moving on to the ears, refine the triangles by making them slightly curved at the top. Then, add a few lines inside the ears to give them texture. You can also add some fur-like lines around the edges of the ears to make them look more realistic.
Step 3: Draw the Eyes and Nose
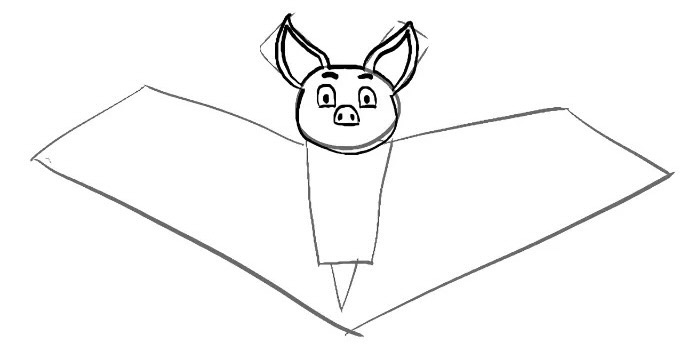
Now that the basic structure of the bat’s head is complete, it’s time to add some details to make it come to life. Start by drawing the pupils inside the eyes. You can make them round or oval-shaped, depending on the expression you want to give your bat. Next, add some eyelashes above the eyes to make them look more feminine.
For the nose, add two small dots on either side of the triangle you drew earlier. These dots will serve as the nostrils. Then, draw a curved line under the nose to give the impression of a mouth. Don’t worry about adding any teeth or fangs just yet, as we will do that in the next step.
Step 4: Draw the Body and the Wings of the Bat
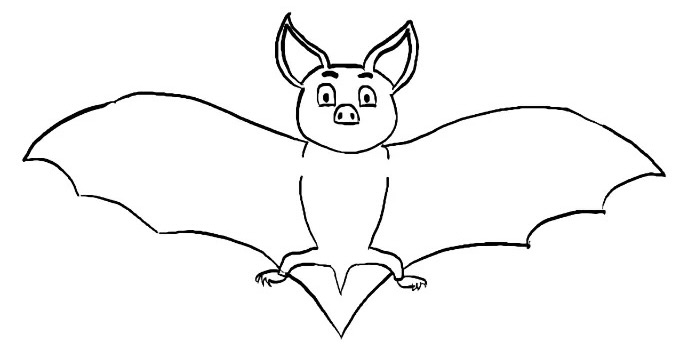
In this step, we will focus on adding details to the body and wings of the bat. Start by refining the ellipse you drew earlier for the body. Make it slightly wider at the bottom and add some curves to give it a more organic shape. Then, refine the rectangles for the wings by adding some curves and jagged edges to make them look like bat wings.
Next, draw two small circles at the top of the body for the shoulders. These will serve as a reference point for the placement of the wings. Then, add a curved line connecting the shoulders to the body. This will be the outline of the bat’s back.
Step 5: Perfect the Wings
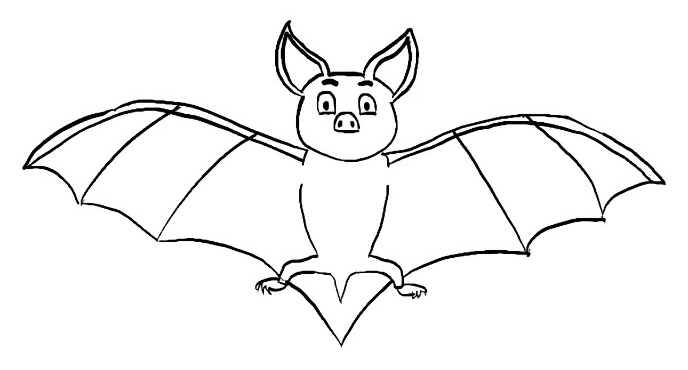
Now that the basic structure of the bat is complete, it’s time to add some details to the wings. Start by drawing the fingers of the bat’s wings. These should be long and thin, with pointed tips. Then, add some webbing between the fingers to give the impression of a membrane.
Next, add some texture to the wings by drawing lines in a fan-like pattern. These lines should follow the shape of the wings and help give them a more realistic appearance. You can also add some fur-like lines around the edges of the wings to make them look more natural.
Step 6: Draw the Mouth and the Fangs
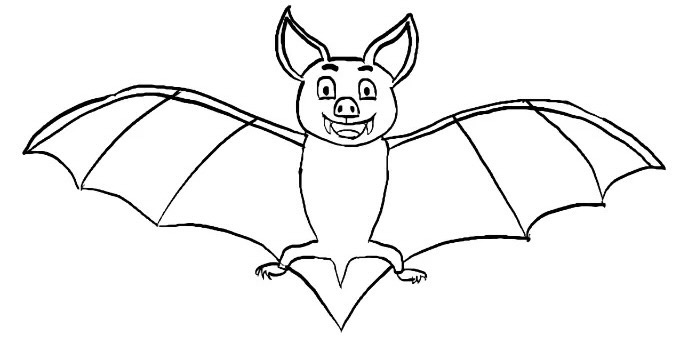
In this step, we will focus on adding the final details to our bat. Start by drawing the mouth using the curved line we added earlier. Then, add two small fangs at the top of the mouth. These fangs should be sharp and pointed, giving the bat a menacing look.
Next, add some fur-like lines around the mouth to give the impression of a furry chin. You can also add some fur-like lines around the body and wings to make the bat look more realistic. Don’t be afraid to play around with different textures and patterns to give your bat a unique look.
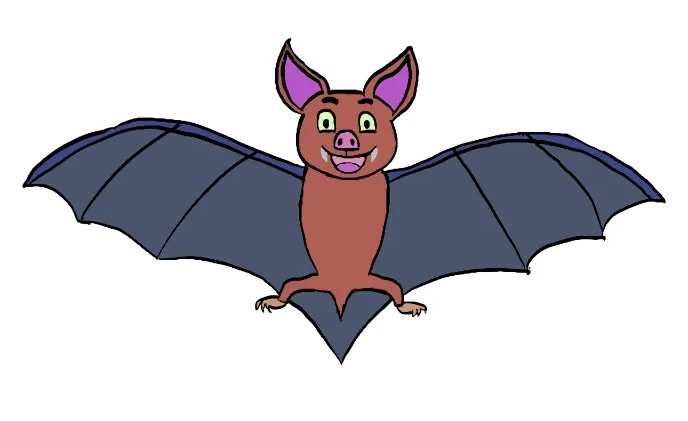
Step 7: Color Your Drawing
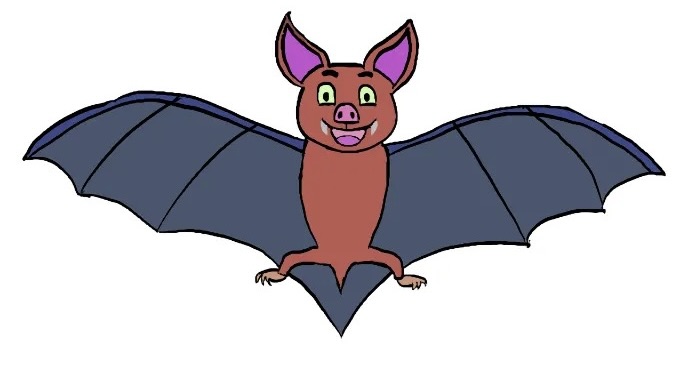
Now that our bat is complete, it’s time to add some color to bring it to life. You can use any colors you like, but for this guide, we will stick to traditional bat colors – black and shades of gray. Start by coloring the body and wings in a dark shade of gray. Then, use a lighter shade of gray to add some highlights and shadows to give the bat a three-dimensional look.
Next, color the ears, nose, and mouth in black. You can also add some shading to these areas to make them stand out. Finally, color the eyes in a bright color, such as yellow or red, to give the bat a spooky look. And there you have it, your very own cartoon bat!
Conclusion
Drawing a cartoon bat may seem intimidating at first, but with the right guidance, it can be a fun and easy process. By following the step-by-step instructions in this guide, you can create your very own bat drawing that is both cute and spooky. Remember to have fun and experiment with different textures and colors to make your bat unique.