Cartoon dragons have been a beloved creature in literature, movies, and art for centuries. From the fierce and fire-breathing dragons of medieval tales to the friendly and funny dragons of modern cartoons, these mythical creatures have captured our imaginations and sparked our creativity.
If you’re looking to learn how to draw cartoon dragons, you’ve come to the right place. In this step-by-step guide, we will break down the process of drawing a cartoon dragon into manageable and easy-to-follow steps. Whether you’re a beginner or an experienced artist, this guide will provide you with the necessary techniques and tips to create your own unique cartoon dragon.
So grab your pencils, paper, and let’s dive into the world of cartoon dragon drawing!
Step-by-Step Guide: Basic Dragon Shape
Before we can start adding details and creating a dynamic pose for our cartoon dragon, we need to establish the basic shape of our dragon. This will serve as the foundation for the rest of our drawing.
Materials Needed:
- Pencils (HB, 2B, 4B);
- Eraser;
- Paper;
- Ruler (optional).
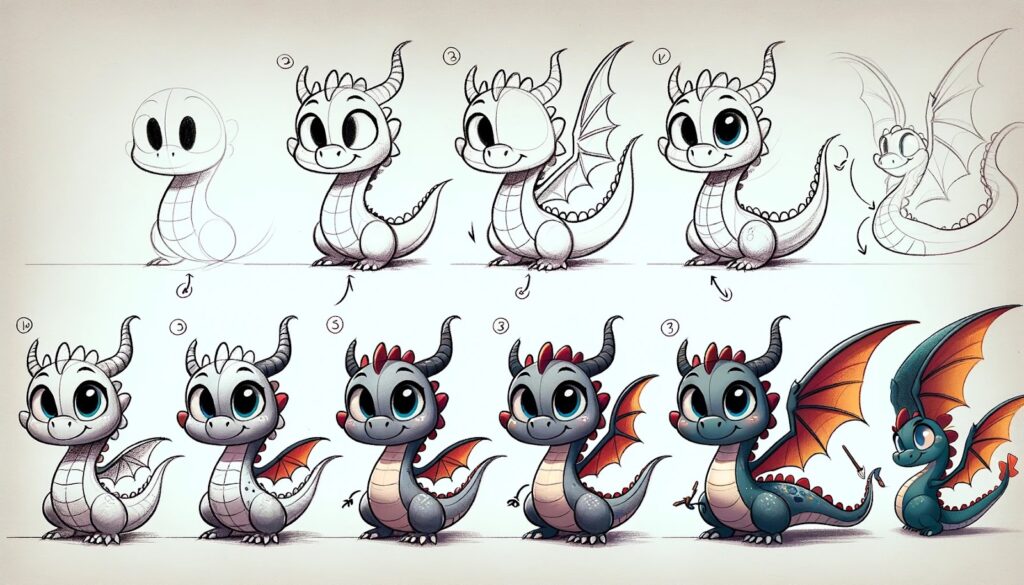
Step 1: Start with Basic Shapes
Begin by lightly sketching a circle for the dragon’s head and a larger oval for the body. These shapes will serve as a guide for the proportions of our dragon.
Next, add two smaller circles for the shoulders and hips, and connect them with a curved line for the spine. This will give us a rough outline of the dragon’s body.
Step 2: Refine the Body Shape
Using the circles and ovals as a guide, start adding more definition to the dragon’s body. Use curved lines to create the neck, chest, and belly of the dragon. You can also use a ruler to help you create straighter lines for the spine and limbs.
Don’t worry about making everything perfect at this stage, as we will be refining and adding details in the next steps.
Step 3: Add Limbs and Tail
Using the basic shapes as a guide, start adding the limbs and tail to your dragon. For the legs, use curved lines to create the thighs, calves, and feet. You can also add claws to the feet for a more realistic look.
For the wings, draw two large triangles on either side of the body. These will serve as the base for our dragon’s wings.
Finally, add a long, curved tail to your dragon. This will give it a more dynamic and playful appearance.
Creating the Dragon’s Head

Now that we have established the basic shape of our dragon, it’s time to focus on the head. The head is often the most expressive part of a cartoon dragon, so it’s important to get it right.
Step 1: Draw the Face Shape
Start by drawing a rough outline of the dragon’s face using curved lines. Make sure to leave enough space for the eyes, nose, and mouth.
Step 2: Add Facial Features
Next, add the eyes, nose, and mouth to your dragon’s face. Cartoon dragons often have large, round eyes, so feel free to exaggerate their size for a more comical effect. You can also add eyebrows and a tongue for added expression.
Step 3: Create the Horns and Ears
Dragons are known for their horns and ears, so make sure to include them in your drawing. Use curved lines to create the horns and add small details such as scales or ridges to make them more interesting. For the ears, you can draw them as simple triangles or add more detail by creating a curved shape with pointed edges.
Step 4: Add Details and Texture
To make your dragon’s head more interesting, add details such as scales, wrinkles, or spikes. These small details will give your dragon a more realistic and dynamic appearance.
Drawing the Dragon’s Body
With the head complete, it’s time to focus on the body of our cartoon dragon. This is where we can get creative and add our own unique touches to our drawing.
Step 1: Refine the Body Shape
Using the basic shape we created earlier, start adding more definition and detail to the dragon’s body. Use curved lines to create the muscles and contours of the dragon’s body. You can also add scales or other textures to make your dragon more interesting.
Step 2: Add Wings
Wings are an essential part of any dragon, so let’s add them to our drawing. Using the triangles we drew earlier as a guide, start adding feathers or scales to the wings. You can also add a bit of shading to give them a more three-dimensional look.
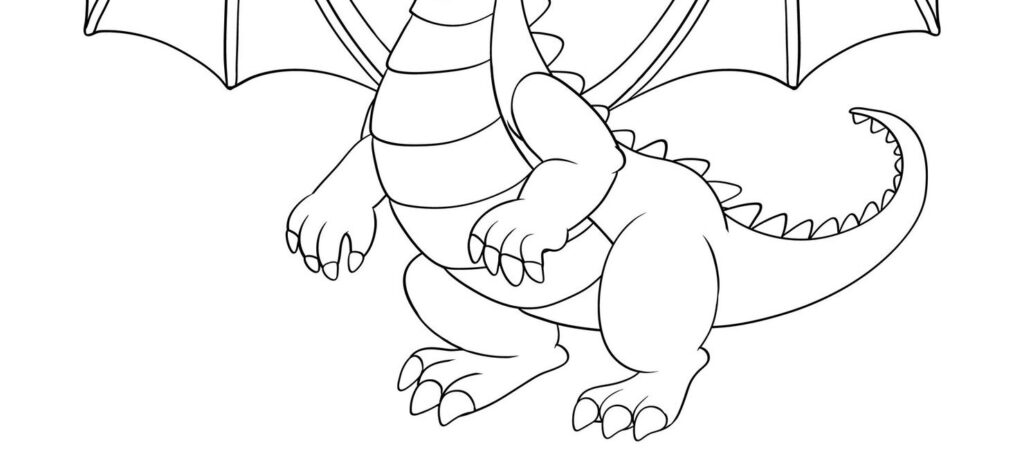
Step 3: Draw the Legs and Tail
Next, focus on the legs and tail of your dragon. Use curved lines to create the muscles and joints of the legs, and add claws for a more realistic touch. For the tail, you can add texture and details such as spikes or ridges to make it more interesting.
Adding Details: Wings and Scales
Now that we have established the basic shape of our cartoon dragon, it’s time to add some details to make it stand out. In this section, we will focus on adding wings and scales to our dragon.
Step 1: Add Texture to the Wings
Using the wings we drew earlier as a guide, start adding texture and details to make them more interesting. You can use curved lines to create feathers or scales, or add shading to give them a more three-dimensional look.
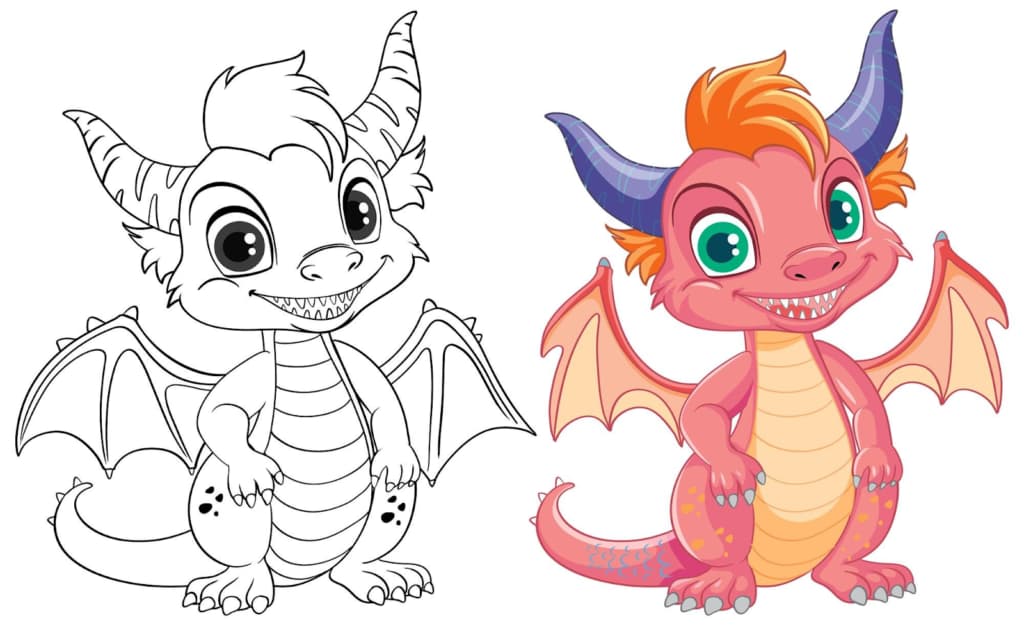
Step 2: Create Scales on the Body
Dragons are known for their scaly skin, so let’s add some scales to our drawing. Using small, overlapping circles, create a pattern on the dragon’s body. You can also use different shades of pencil to give the scales more depth and dimension.
Step 3: Add Details to the Face
To make your dragon’s face more interesting, add details such as wrinkles, spikes, or horns. These small details will give your dragon a more unique and dynamic appearance.
Designing the Dragon’s Tail
The tail is often an overlooked part of a cartoon dragon, but it can add a lot of character and personality to your drawing. In this section, we will focus on designing the dragon’s tail.
Step 1: Add Texture to the Tail
Using the tail we drew earlier as a guide, start adding texture and details to make it more interesting. You can use curved lines to create spikes or ridges, or add shading to give it a more three-dimensional look.
Step 2: Create a Dynamic Pose
To make your dragon’s tail more interesting, try experimenting with different poses. You can have the tail curling around the dragon’s body, or stretching out behind it. This will add movement and energy to your drawing.
Step 3: Add Accessories
If you want to take your dragon drawing to the next level, consider adding accessories such as a saddle, armor, or even a knight riding on its back. This will add a story and narrative to your drawing, making it more engaging for the viewer.
Techniques for Drawing Dynamic Dragon Poses
Now that we have covered the basics of drawing a cartoon dragon, let’s take it a step further and learn how to draw dynamic poses for our dragon. This will make our dragon drawings more interesting and exciting.
Step 1: Start with Basic Shapes
Just like in the earlier steps, start by sketching out the basic shapes for your dragon’s body. This will serve as a guide for the rest of the drawing.
Step 2: Add Movement and Energy
To create a dynamic pose, think about the movement and energy you want to convey. Is your dragon flying? Running? Breathing fire? Use curved lines to show the direction of the movement and add details such as wind or fire to make it more realistic.
Step 3: Experiment with Different Poses
Don’t be afraid to experiment with different poses for your dragon. Try having it standing on two legs, or crouching down ready to pounce. The possibilities are endless, so have fun and be creative!
Enhancing Your Dragon with Accessories
Accessories can take your cartoon dragon drawing to the next level. They can add a story and personality to your dragon, making it more interesting for the viewer. In this section, we will explore some accessories you can add to your dragon drawing.
Step 1: Add a Saddle or Armor
One way to enhance your dragon is by adding a saddle or armor. This will give your dragon a more regal and powerful appearance. Use curved lines to create the shape of the saddle or armor, and add details such as straps or buckles for a more realistic look.
Step 2: Include a Knight or Princess
Another way to add a story to your dragon drawing is by including a knight or princess riding on its back. This will give your drawing a sense of adventure and fantasy. Use curved lines to create the figure of the knight or princess, and add details such as armor or a dress to make them stand out.
Step 3: Experiment with Different Accessories
Don’t limit yourself to just saddles and knights. You can also experiment with other accessories such as hats, scarves, or even a treasure chest. These small details will add depth and personality to your cartoon dragon.
Digital Tools for Cartoon Dragon Drawing
In today’s digital age, there are many tools available for artists to enhance their drawings. If you prefer to draw digitally, here are some tools you can use to create your cartoon dragon.
Software:
- Adobe Photoshop;
- Procreate;
- Clip Studio Paint;
- Krita.
Drawing Tablets:
- Wacom Intuos;
- Huion Inspiroy H640P;
- XP-Pen StarG640.
These tools offer a wide range of features such as layers, brushes, and special effects that can help bring your cartoon dragon to life. However, it’s important to remember that traditional drawing techniques are still valuable and should not be overlooked.
Tips for Beginners: Common Pitfalls and Solutions
Drawing a cartoon dragon can be challenging, especially for beginners. Here are some common pitfalls and solutions to help you overcome any obstacles you may encounter during the drawing process.
Pitfall #1: Proportions are Off
Solution: Use reference images or draw basic shapes first to establish proportions.
Pitfall #2: Lack of Detail
Solution: Add texture and details such as scales, wrinkles, or spikes to make your dragon more interesting.
Pitfall #3: Uninteresting Pose
Solution: Experiment with different poses and think about the movement and energy you want to convey.
Pitfall #4: Overcomplicating the Drawing
Solution: Start with basic shapes and add details gradually. Don’t be afraid to simplify certain elements if needed.
Pitfall #5: Not Using References
Solution: Use reference images or videos to help you understand the anatomy and movement of dragons.
Conclusion
Drawing a cartoon dragon may seem daunting at first, but with practice and patience, anyone can learn how to create their own unique dragon. By following this step-by-step guide, you now have the necessary techniques and tips to draw a dynamic and playful cartoon dragon.
Remember to start with basic shapes, add details and texture, and experiment with different poses and accessories. And most importantly, have fun and let your imagination run wild!